Hello, welcome! I am happy you’re here today. Today’s recipe is a special request from Alex, who has been sorely missing his favorite falafel sandwich. Falafel is a chickpea fritter, with herbs and spices, fried to a golden brown. It’s often served in a pita with cucumbers, tomatoes and tahini sauce or hummus. My favorite place to get falafel was near my old office in Cupertino, California and you could get your falafel sandwich with herby french fries tucked inside. So good! Today, we can do it however we like because this is the best homemade falafel I have ever tasted! Let’s do it, Falafel with Tahini Yogurt Sauce.

Start by soaking the 8 ounces (about 1 and 1/4 cups) dried chickpeas overnight. It’s not recommend to use canned chickpeas because they will make the falafel stodgy, and I reckon it’s because the the canned chickpeas are already cooked, so instead of going into the mixture firm and uncooked, they will just get overcooked and mushy in the hot oil.
Tahini Yogurt Sauce
Let’s make the sauce first, so the flavors can mingle while we make the falafel. This is a really simple sauce; equal parts tahini and full fat, plain Greek yogurt; mixed with a little lemon juice, salt to taste and water to thin it out. Mix the tahini, yogurt and 1/4 cup lemon juice to a smooth consistency. Add a tablespoon of water at a time to thin it out to your desired consistency and then add a pinch of Kosher salt at time, and taste to add more salt as necessary. By the time we add the sauce to our falafel, you may want to add a little more more water to thin it out a little more.


Mixed tahini yogurt sauce.
Falafel

In a food processor, process the chopped parsley, cilantro leaves and stems, chopped onion, garlic, coriander, cumin, salt, and cayenne to a pesto-like consistency.


Then add the soaked and drained chickpeas to the processor and pulse several times, until the chickpeas are chopped into sesame seed-sized pieces.

Add chickpeas.

Process until the chickpeas resemble sesame seeds.
Transfer the falafel mixture to a large bowl and set aside. Now for the unexpected part. A cooked flour mixture will bind the falafel so we can form it into balls. The cooked flour (rather than dry, uncooked flour) will help keep the falafel moist and tender. In a small bowl whisk 1/4 cup flour and 1/4 cup water to a smooth, lump-free consistency.

Flour and water.

Whisked to a lump-free mixture.
Now, microwave this mixture 5 seconds at a time, stirring at the intervals, until the mixture cooks into a thick pudding-like paste. Depending on the power of your microwave, this can take 10-50 seconds. My mixture took about 18 seconds. I overcooked it 2 times; it’s overdone when the mixture becomes a hard lump. The original recipe suggests checking it every 10 seconds, but for me, even 20 seconds was overcooking it. So I played it safe and checked and stirred it every 5 seconds.

This is a properly cooked flour paste.
Then we add two teaspoons baking powder to the cooked flour mixture. While the cooked flour mixture will keep the falafel moist, the baking powder will keep the falafel light. Stir in the baking powder and you will see the flour mixture immediately lighten up and get fluffy.

Add the baking powder.

Stir until well-incorporated.
Now, add this flour/baking powder mix to the falafel mixture and stir until the flour mix is completely incorporated.

Stir in the cooked four/baking powder mixture.

Lightly stir in the flour mixture until it’s fully incorporated.
Form the Falafel
Line a sheet tray with a sheet of parchment and set next to the bowl of falafel mix. I have a two tablespoon cookie scoop that I am using to shape the balls.

I scooped the balls to get them all measured out, and then went back and formed the scoops into balls, like a meatball. This mixture yielded 18, 2.5 tablespoon falafel balls. Place the sheet tray in the fridge while we set up the fry station. Add 2 quarts of vegetable oil to a dutch oven fitted with a thermometer; place a wire rack inside a sheet tray (to catch the fried falafel); set a spider, or slotted spoon nearby.
Pro Tip
The key to successful frying at home is organization. Setting up your fry station thoughtfully will make the frying go smoother, minimizing the likelihood of burnt food and hot oil accidents. It will also help keep things clean. Set up your pot of oil on a corner front burner. Then place one sheet pan on either side of the pot. One for the food to be fried, and one for the food that is already fried. Have your spider skimmer close. Use a candy thermometer that clips to the pot securely. Have your kosher salt near the fried food tray so you can season the food as soon as it comes out of the oil.
Over medium-high heat, get the oil up to 325 degrees. While we wait for that, slice some cucumber, grape tomatoes, iceberg lettuce and rough chop some cilantro and parsley. Set those toppings aside. When the oil is at temp, drop in about 5-6 falafel. Wait about 30 seconds, then use the spider or a long handled spoon to gentle stir the falafel balls in the oil to keep them from sticking. Gently dislodge any falafel if they stick to the bottom of the pot.

When they are deep golden brown (about 4-5 minutes), scoop them out and set them on the wire rack and season with Kosher salt. Repeat with remaining falafel. Adjust the heat as necessary to maintain the 320-325 degree temp of the oil.

Golden brown falafel.

Season with Kosher salt.
Plate it up!
When the falafel are all fried to golden perfection, warm some pita or flat bread (I have lavash) and place the warmed bread on a plate.
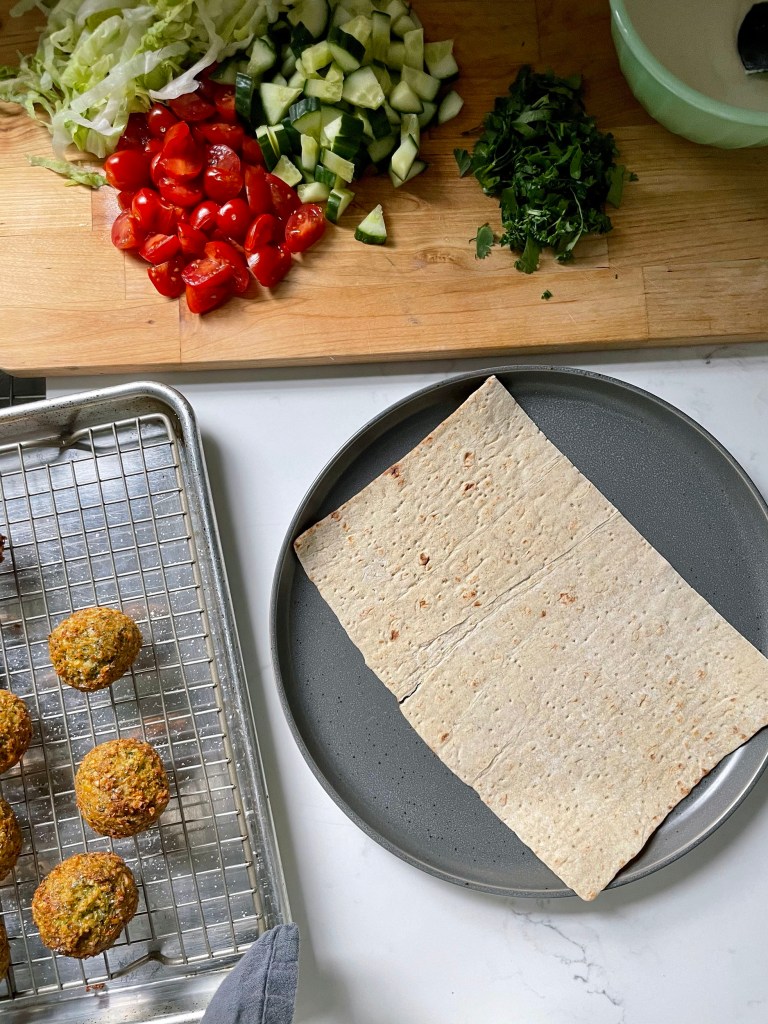
Sandwich assembly.

Falafel interior.
Add a small handful of shredded lettuce, then drizzle on some of the tahini yogurt sauce. Place a few falafel and drizzle on some more tahini sauce. Top with cucumber, tomatoes, herbs and hot sauce, if you like.

Lettuce and tahini sauce.

Add falafel.

More tahini sauce, add veggies and herbs.
So gorgeous, colorful, fresh and flavorful! The falafel are crunchy and light, the interiors are perfectly cooked, not at all stodgy. Restaurant-worthy falafel right in your own kitchen!

Falafel with Tahini Yogurt Sauce
To serve on a flat bread like lavash, just assemble the ingredients lengthwise down the center and roll up the long sides like a burrito or fold like a taco and enjoy!
I hope you make this Falafel with Tahini Yogurt Sauce! It’s so good; a wonderful light, vegetarian meal. And while I am not a huge fan of deep frying, the little falafel balls are not messy to fry and the whole thing goes really quickly. You can find a similar sandwich, but with Chicken Kofta, on the blog, and I definitely recommend trying this wonderful falafel recipe! Let me know if you make this dish, reach out to me on Instagram or facebook, or leave a comment below – I love to hear from you! Take care and be well, xo Kelly
Kitchen Tools Used in This Recipe
Click on the image to be directed to the recommended product.
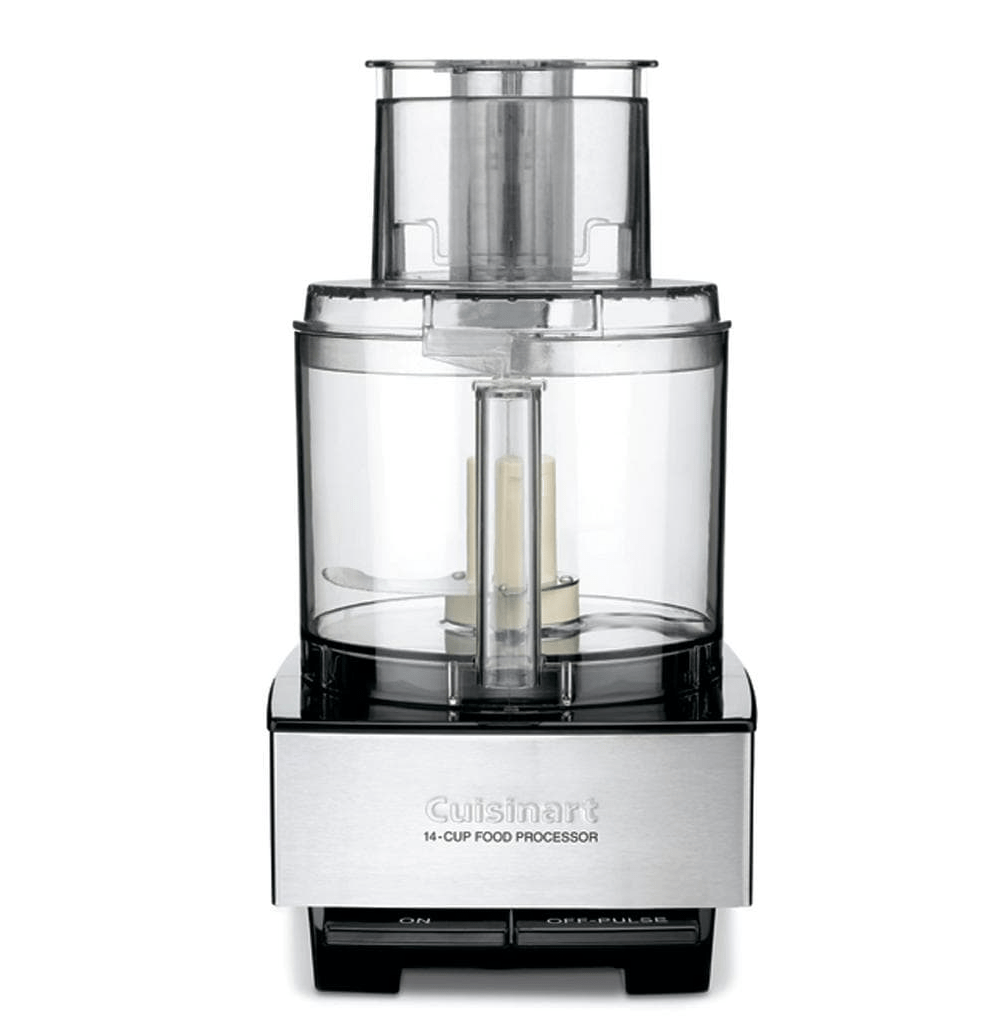
Cuisinart 14-cup Food Processor

Similar Jadeite Bowls – Set of 3

OXO 1.5 tablespoon Cookie Scoop

Le Creuset 7.25-qt. Dutch Oven

Taylor Candy Thermometer

Carbon Steel Nonstick Cooling Rack

Nordicware Half and Quarter Sheet Pan Set

Spider Skimmer

Falafel with Tahini Yogurt Sauce
 (1 votes, average: 5.00 out of 5)
Gorgeous, colorful, fresh and flavorful! These falafel are crunchy and light, with fluffy interiors. Restaurant-worthy falafel right in your own kitchen!
Ingredients
- Falafel
- 8 oz. Dried Chickpeas, picked over and rinsed
- ¾ cup Fresh Cilantro Leaves and Stems
- ¾ cup Fresh Parsley Leaves
- ½ Onion, chopped fine
- 2 Garlic cloves, minced
- 1½ tsp. Ground Coriander
- 1 tsp. Ground Cumin
- 2 tsp. Kosher Salt
- ¼ tsp. Cayenne Pepper
- ¼ cup All-Purpose Flour
- 2 tsp. Baking Powder
- 2 quarts Vegetable oil, for frying
- Tahini Sauce
- ⅓ cup Tahini
- ⅓ cup Plain Greek Yogurt
- ¼ cup Lemon Juice (2 lemons)
- ¼ cup Water
- Kosher Salt, to taste
- Flat Bread, Shredded Iceberg, Sliced Cucumbers, Sliced Tomato, Chopped Fresh Herbs, Hot Sauce, for serving
Instructions
Chickpea Prep
Place chickpeas in large container and cover with water by 2 to 3 inches. Soak at room temperature for at least 8 hours or up to 24 hours. Drain well.
Tahini Sauce
Whisk tahini, yogurt, and lemon juice in medium bowl until smooth. Whisk in water to thin sauce as desired. Season with salt to taste; set aside. (Sauce can be refrigerated for up to 4 days. Let come to room temperature and stir to combine before serving.)
Falafel
Process cilantro, parsley, onion, garlic, coriander, cumin, salt, and cayenne in food processor for 5 seconds. Scrape down sides of bowl. Continue to process until mixture resembles pesto, about 5 seconds longer.
Add chickpeas and pulse 6 times. Scrape down sides of bowl. Continue to pulse until chickpeas are coarsely chopped and resemble sesame seeds, about 6 more pulses. Transfer mixture to large bowl and set aside.
Whisk flour and ⅓ cup water in bowl until no lumps remain. Microwave, whisking every 5 seconds, until mixture thickens to stiff, smooth, pudding-like consistency that forms mound when dropped from end of whisk into bowl, 15-60 seconds.
Stir baking powder into flour paste.
Add flour paste to chickpea mixture and, using rubber spatula, mix until fully incorporated.
Use a heaping 2 tablespoons to measure 18-20 falafel balls. Gently roll into golf ball–size spheres, transferring spheres to parchment paper–lined rimmed baking sheet once formed. (Formed falafel can be refrigerated for up to 2 hours.)
Heat oil in large Dutch oven over medium-high heat to 325 degrees.
Add 5-8 falafel and fry, stirring occasionally, until deep brown, about 5 minutes.
Adjust burner, if necessary, to maintain oil temperature of 325 degrees.
Using slotted spoon or wire skimmer, transfer falafel to a wire rack in a sheet tray and sprinkle with Kosher salt.
Return oil to 325 degrees and repeat with remaining falafel. Serve immediately with tahini sauce.
This post may contain affiliate links; when you click the links and make a purchase, we receive a commission on qualifying items.


Terry
April 26, 2021 at 10:23 amI love falafels. I will definitely give this one a shot. I’ll keep you posted on this one ❤️Mom
Kelly Djalali
April 26, 2021 at 10:27 amHi Mom, The cooked flour/baking powder really makes these light and fluffy. I am sure you’ll love them! xo Kelly
Rena Berowski
April 26, 2021 at 10:53 amDo you think these can be frozen?
Kelly Djalali
April 26, 2021 at 11:21 amHello Rena! Yes, they can be frozen. Just form them into balls and let them freeze on a plate or pan. Once frozen you can pop them into a Ziplock bag. Fry straight from frozen. Just increase the fry time from about by about 30-60 seconds. Thanks so much for asking! xo Kelly
Judi Hume
April 26, 2021 at 10:57 amThese look FABULOUS and I always love your instructions! I hope you’ll write a cookbook, because if /when you do, I’ll definitely buy it! 🙂
Kelly Djalali
April 26, 2021 at 11:23 amAwww, thank you Judi! I am working up to it! 🙂 Have a beautiful day, xo Kelly
Sylvia Espinoza
April 26, 2021 at 2:50 pmHi, Kelly! Ditto what Judi said!…If life slows down soon, would love to try making falafel…especially because it can be frozen. Appreciate the share on your new LeCreuset 6.5 Dutch oven! Perfect tool for you. Hugs! ~
Kelly Djalali
April 26, 2021 at 3:05 pmHi Sylvia! Yes, the Dutch oven is a great piece of cookware to have for life! When you find yourself with a little time and energy to make up a batch of the falafel, it’s really worth it! Especially to freeze for later. Thank you so much for stopping by to say hello today 🙂 xo Kelly
Holly
April 9, 2022 at 12:28 pmKelly- we love falafel and I am confident I could make it with your excellent instructions. However, what do I do with all the left-over oil.? Can I use it again and if so, how to store it? If it can’t be reused, how to get rid of it? It’s the roadblock to my deep fat frying. Any advice? Thanks!
Kelly Djalali
April 9, 2022 at 1:18 pmHi Holly, great question! I save and reuse frying oil once or twice more. Let the oil cool, then find a container that will hold the volume of oil. Strain the oil through a fine mesh strainer into your chosen container. And that’s it. Close up the container, store it in your pantry or the fridge and save it for another time. If you are saving oil from frying meat, I would store it in the fridge. To get rid of the oil, I do the same thing, but I don’t bother with straining it. Then seal up the container and throw it in the trash. Never pour it down the drain! I hope that helps clear your roadblock! xo Kelly
Holly
April 9, 2022 at 5:23 pmKelly- Thanks for the helpful advice! I’ll try the falafel and let you know how we fare.
Best Wishes, Holly
beth byrd
April 9, 2022 at 1:53 pmI’m such a big fan of falafels! Your blog is amazing … your photos are spectacular and I SO appreciate how you show each step in the process. Wonderful! Thank you!
Kelly Djalali
April 9, 2022 at 2:15 pmThank you so much, Beth! It’s a win for me if my photos and instructions help demystify the process and give inspiration to try it yourself! Have a great day, xo Kelly
Mary Ann Grimes
April 14, 2022 at 7:31 pmI made this last night and it was a hit! Delicious recipe. I was able to use the herbs from my garden. So ? yummy!
Kelly Djalali
April 15, 2022 at 7:59 amHello Mary Ann, Excellent! I am so happy you tried this one and you used herbs from your garden – love it! Thanks for reporting back on your success with this recipe, xo Kelly